In today's digital age, showcasing your hairstyling skills through captivating photographs is essential for attracting new clients and building a strong online presence. Though sometimes taking that perfect photo is hard when you aren't a photographer.

(Source: @thestrawberryblonder)
How can we capture the true beauty of that color or cut you just worked so hard on? This guide will help you improve your hair photography skills and create professional-looking images that truly showcase your artistry!
(Source: @_studio.k)
(Before we begin, just so you are aware, if you are having an issue with blurry or grainy images it may not be your photography skills to blame. Most high-profile cosmetologists recommend having an updated iPhone to take photos with. Having an older model phone may result in blurry images.)
Lighting
Good lighting is crucial for capturing clear, well-lit images. Natural light is ideal, so position your client near a window or opt for soft, diffused lighting. Avoid harsh, direct overhead lighting as it can cast unflattering shadows.
If you're an iPhone user, here are some tips you can try to help improve your lighting.
The iPhone camera app provides users with various options to control and adjust lighting settings, allowing for better exposure and capturing clear, well-lit images. Here's how you can make the most of your iPhone's camera settings:
Enable Auto HDR (High Dynamic Range): The Auto HDR feature on the iPhone helps capture a wider range of light and dark tones in a single image, resulting in a more balanced and evenly exposed photograph. To enable Auto HDR, follow these steps:
- Open the Camera app on your iPhone.
- Tap on the "HDR" icon located at the top of the screen.
- Select "Auto" from the available options.
By enabling Auto HDR, your iPhone will automatically analyze the scene and determine when to use HDR to improve the overall exposure.
Adjust Exposure and Focus: The iPhone camera allows you to manually adjust the exposure and focus settings to control the lighting conditions. This is particularly useful when dealing with challenging lighting situations or to emphasize specific areas of the hairstyle. To adjust exposure and focus:
- Tap on the screen where you want to set the focus and exposure. This can be a specific part of the hair or the client's face.
- Once the yellow square appears to indicate focus, you can swipe up or down on the screen to adjust the exposure manually. Swipe up to increase exposure for brighter images or swipe down to decrease exposure for darker images.
- Experiment with different exposure levels to find the optimal balance that captures the details and colors of the hairstyle accurately.
Use the Portrait Mode: The Portrait mode on newer iPhone models, such as the iPhone X and later, allows you to create professional-looking photos with a blurred background, known as the bokeh effect. This feature is especially effective for highlighting the hairstyle and separating it from the background. Here's how to use Portrait mode:
- Open the Camera app on your compatible iPhone model.
- Swipe left or right until you reach the "Portrait" mode option.
- Position your client near a window or in soft, diffused lighting.
- Follow the on-screen prompts to ensure the subject is within the frame and properly lit.
- Tap the shutter button to capture the image.
Portrait mode automatically detects the subject and applies depth-of-field effects, resulting in a stunning, professional-looking photograph.
Avoid Using Flash: In most cases, using the iPhone's built-in flash can create harsh lighting, unflattering shadows, and wash out the hair color. It's generally best to avoid using the flash when capturing hair photographs. Instead, opt for natural or soft, diffused lighting to maintain the integrity of the hairstyle and ensure accurate color representation.
Background and Setting
When it comes to the background and setting of your hair photography, selecting the right environment can significantly enhance the overall impact of your images. Here are some tips to help you create a clean and visually appealing backdrop for your clients' hairstyles

The primary goal of the background is to keep the focus on the hair. Choose a background that is simple, clean, and uncluttered to avoid distractions. A solid-colored wall, a plain backdrop, or a neatly arranged salon area can serve as excellent options. Avoid backgrounds with busy or competing elements that may draw attention away from the hair.
Remove Distractions
Before capturing the photograph, scan the area to ensure there are no distracting objects, clutter, or unnecessary items in the frame. Remove any equipment, product bottles, or personal belongings that may divert attention from the hairstyle. Pay attention to details such as cords, cluttered surfaces, or reflections that can create visual noise. Remember, a clean and minimalistic background will help the hair take center stage.
Consider using Props
While keeping the background simple is crucial, you can enhance the overall aesthetic appeal by adding carefully chosen props or accessories that complement the hairstyle. Props can help create context or add visual interest to the image without overpowering the main subject. For example, a decorative hairpin can accentuate the style while adding a touch of uniqueness. However, exercise restraint to ensure the props don't overshadow the hair itself.

(Source: @morgancombscreations)
Pay Attention to Color Coordination
Consider the color palette of the background and how it complements the hair color and style. Harmonious color coordination can create a visually pleasing and cohesive image. For instance, if your client has vibrant red hair, a neutral or muted background can help the hair color pop. Experiment with different background colors to find the ones that enhance the hair's visual impact without clashing.
Depth and Dimension: Adding depth and dimension to your hair photography can elevate the visual interest. You can achieve this by creating a sense of distance between the subject and the background. Position your client away from the background to create separation, allowing the hair to stand out prominently. Experiment with different depths and distances to find the most flattering arrangement for showcasing the hairstyle.
Test Different Shooting Angles: Along with the background, consider how different shooting angles and perspectives can enhance your hair photography. Experiment with shooting from various heights, sides, or even from above to capture unique viewpoints that showcase the hairstyle's dimensions and intricacies. Be willing to move around your subject and explore different angles until you find the most captivating composition.
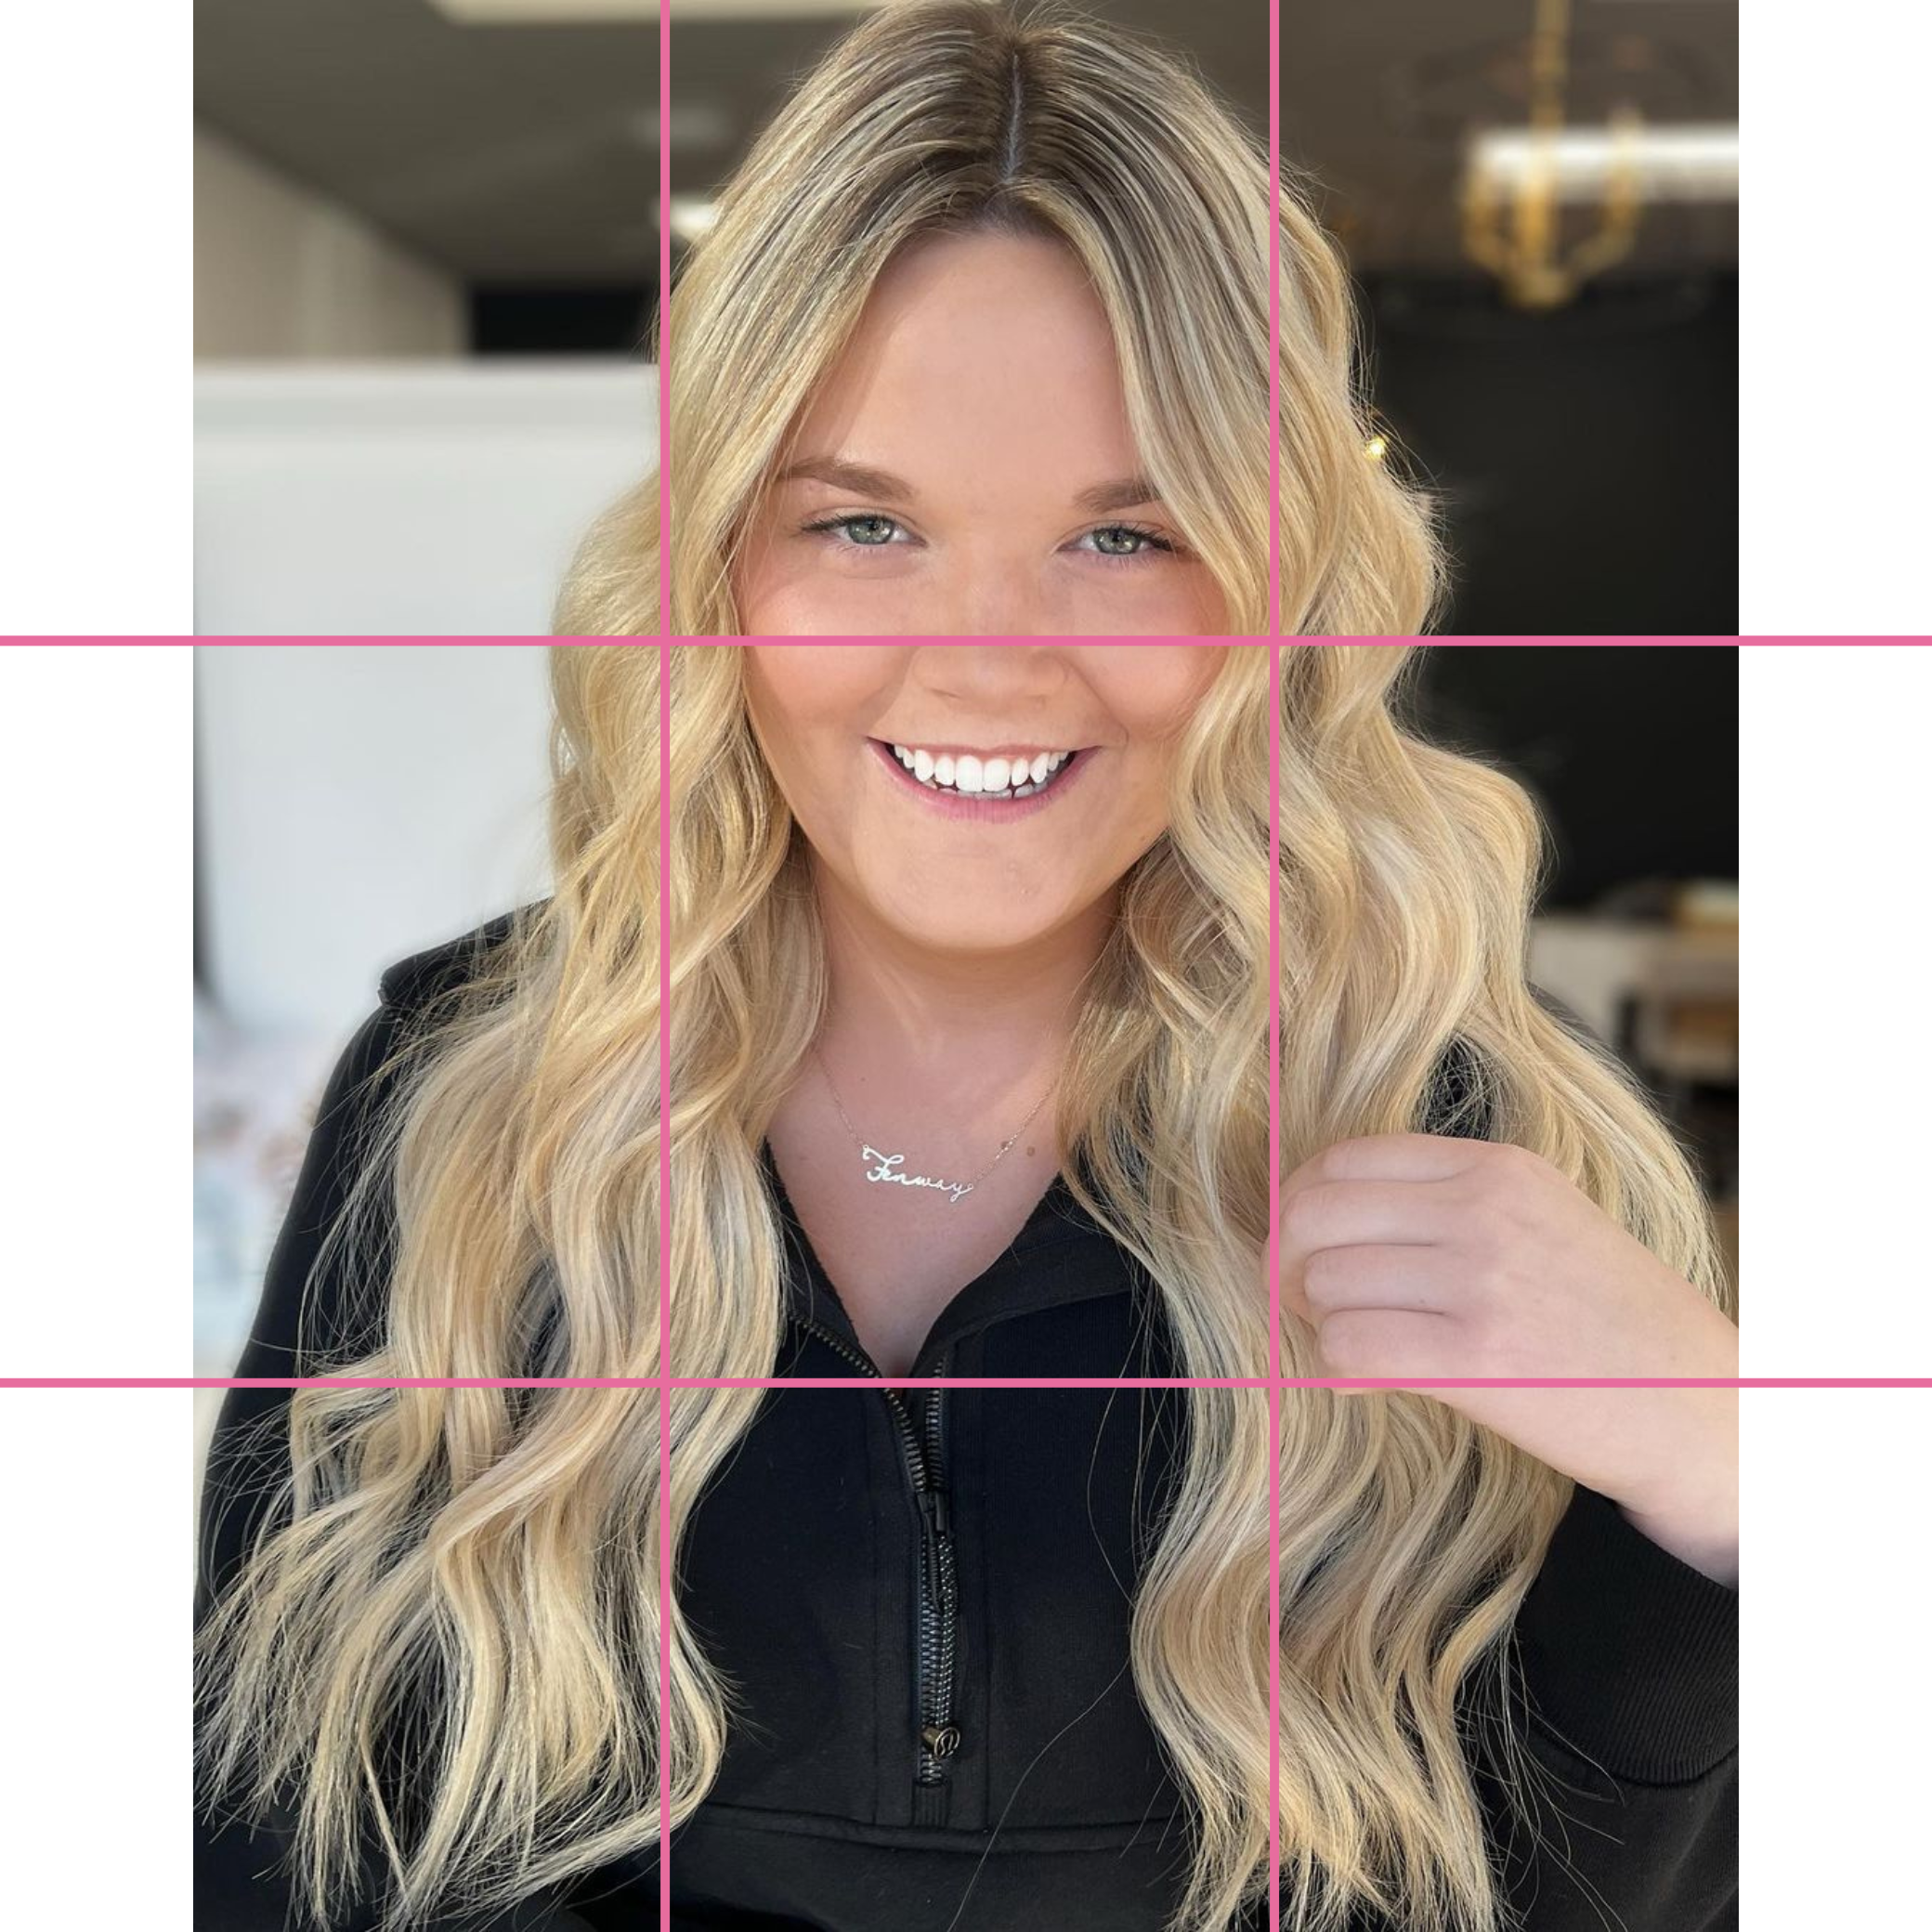
Rule of Thirds
The Rule of Thirds is a principle in photography that can greatly improve your hair photos! By dividing your frame into a 3x3 grid, you can effectively position key elements, such as the face or the hairstyle, at specific points within the grid to create a visually pleasing composition.

First, ensure that your iPhone's camera settings have the gridlines option enabled. This will overlay a 3x3 grid on your camera viewfinder, making it easier to align your subject within the composition.
Next, imagine two horizontal lines and two vertical lines dividing the frame into nine equal parts. The four points where the lines intersect are considered the most visually powerful areas of the frame. These are the primary points of interest in the Rule of Thirds.
Position key elements, such as the face or the focal point of the hairstyle, at or near these intersection points or along the lines themselves. This placement adds balance and visual interest to the image.
-
For a portrait showcasing a particular hairstyle, you might position the client's face near one of the upper intersection points, allowing the hairstyle to flow within the frame.
-
If the hairstyle has an interesting detail or focal point, such as an intricate braid or an updo, aligning it along one of the vertical lines can create a dynamic and visually pleasing composition.
-
When capturing full-length hairstyles, consider aligning the subject along one of the vertical lines, allowing the hair to flow naturally within the frame while maintaining balance.
It's important to note that the Rule of Thirds is not a strict rule, but rather a tool to help you create more visually pleasing compositions.
Poses and Angles
When it comes to taking gorgeous hair photos, exploring different angles and poses can significantly enhance the visual impact of the hairstyle. By trying out various viewpoints, you can showcase the overall look, texture, and dimension of the hair.

Different Heights:
Varying the height when you take the photograph can provide different perspectives and emphasize of the hairstyle. Try capturing the hair from eye level, slightly above, or even from a lower angle. Experimenting with different heights allows you to showcase volume, layers, and overall hair structure in a visually appealing way.
Touching the Hair:
Don't be afraid to interact with the client's hair during the photoshoot. Gently picking up sections of the hair or running your fingers through it can create movement, texture, and dimension in the photographs. This technique can make the hair appear fuller and add a sense of liveliness to the images.
Client Posing:
Guide your clients on how to pose to complement the hairstyle. Consider their facial expressions, body posture, and hand positioning. Encourage them to adopt natural and confident poses that showcase the hair to its full potential. Experiment with different poses that enhance the hairstyle's shape, highlights, and overall appeal.
Remember to communicate with your clients throughout the process, ensuring they feel comfortable and confident. Discuss your ideas, demonstrate the poses, and provide gentle guidance to help them achieve the desired look and feel for the photographs.
So, armed with your trusty iPhone and a sprinkle of creativity, go forth, my hairstylist/photographer friends!
Embrace the power of lighting, composition, and that witty sense of humor to capture the beauty of your clients' hair transformations. May your photographs be as jaw-dropping as a fabulous hair flip and as captivating as a perfectly styled 'do.
And through it all, remember to keep things light-hearted and fun, because who doesn't want to giggle and feel fabulous while capturing the perfect hair moment?
P.S. Remember to wipe off any rogue hairs from your iPhone lens before you start snapping. We wouldn't want your photography to be hair-raising in all the wrong ways!